
I’m going to share with you 3 easy ways for you to get into scrapbooking. That is not going to cost you a lot of money, using stuff that you most probably already have at home.
I’ve been scrapbooking for close to 21 years. I started when Alex was 6 months old, and he will be turning 21 in July.
What is scrapbooking? It’s a way to document your memories using photos and words. That’s it, its that simple! Yes, you can buy all the fancy albums, and stamps and pretty papers, embellishments, kits and fancy cutting machines. And I have most of these things, BUT you don’t have to have them in order to document your life and scrapbook.
So I’m going to show you 3 ideas on how to get started!
Journal
You can simply use any notebook that you already have at home and start a journal. It’s as easy as getting your photo, sticking it into the journal and writing down something about the picture. Something that made you smile, or that you want to remember of the time the photo was taken, something that you are grateful for.
- notebook from Kmart I found this Dot Journal just for $4.00
- Glue stick or double-sided tape
- pen to write your journaling


I do my own version of a Bullet Journal. I use it to write down goals, plan for our trips away and personal thoughts. I also use it for tracking habits and any personal projects that I’m working on right now. I also some photos in it. I have a monthly calendar that I take a photo from each day, print it out as a small square and stick it in there.
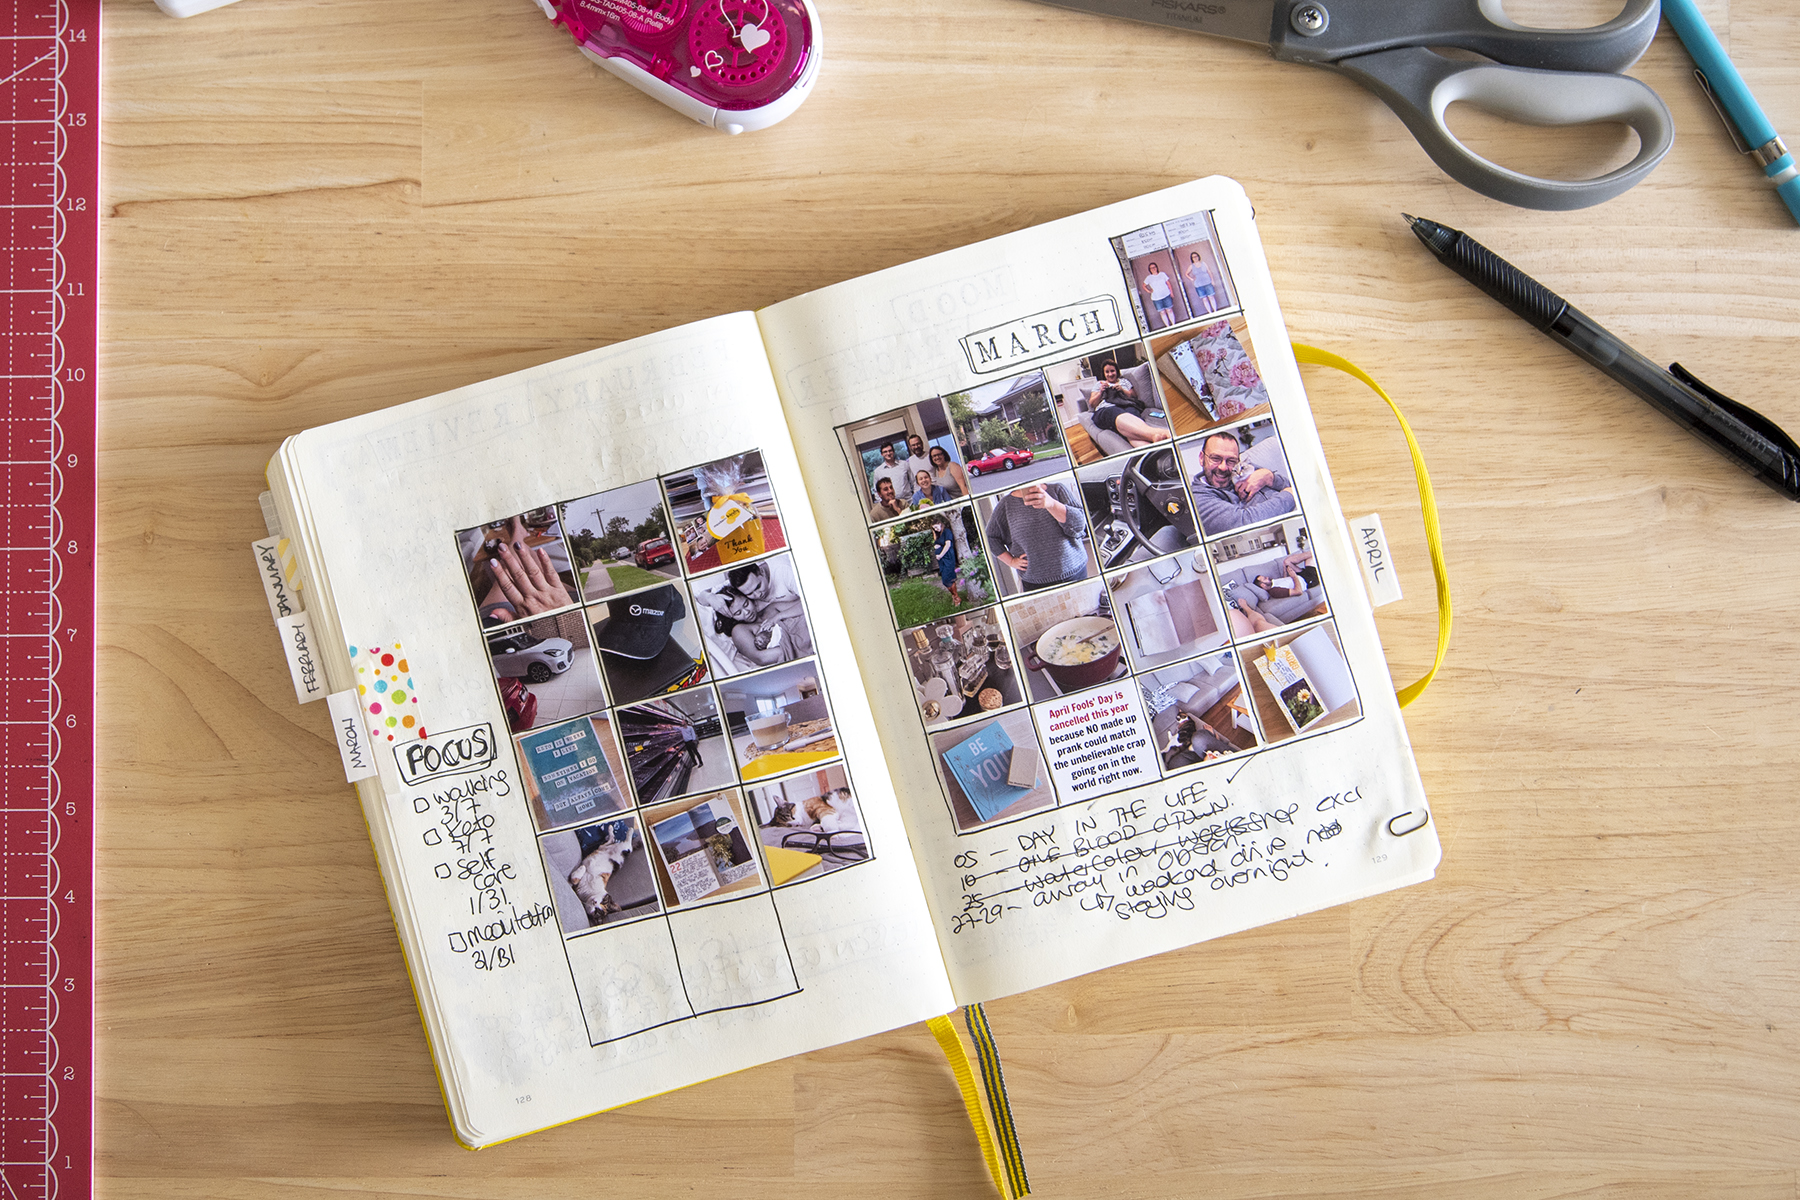
Photo Album
There are lots of companies that sell dedicated Scrapbooking albums. Unfortunately, most of them are online and overseas which does become a bit expensive. We are lucky to have a dedicated Scrapbooking Shop here in Narellan. Scrapbook Sensations the girls run classes as well as sell all the pretties you might want! including albums, stamps, tools, and scrapbooking papers, plus lots more. I love the fact that they are local to me and love popping in and seeing what they have and getting some supplies. All my black scrapbook Albums I order through Tracey at the shop.
My other favourite Scrapbooker is Ali Edwards. I’ve been following Alis journey through scrapbooking pretty much since when she started in 2004. I love her style of scrapbooking and all her products. She sells Story Kits that you can subscribe to every month. I may have been a collector of these for the past 18 months, and finally making sure that I’m using all that I have collected!
I also do what’s called Project Life. Also well known to be called Pocked page scrapbooking. You can buy page protectors for your album that have specifically designed pockets to hold your photos, journaling and bits and bobs. You can document your life weekly, monthly or on special occasions. I do a bit of both. Usually, my scrapbooking pages cover a week at a time. I take ALOT of photos, being a photographer and all. So sometimes my weekly pages carry over to more than one scrapbook page. The last few years I have averaged 2 12×12 albums pre year. 2019 I managed to do just one album.


Yes, I have ALL the pretties in physical and digital format, but you don’t have to buy all the stuff to still use an album!
- Kmart Photo album $8.00
- card stock paper
- stapler
- Big W Alpha Stamps $10.00
- Yellow Washi tape
- White Gift Tags from Big W $3.00


Printed photo cut down slightly to leave a white frame around the white cardstock. Card stock paper cut down to size 20.5cm x 10.3cm to fit in the album pocket. Yellow ribbon stapled on to the gift tag, the Alpha stamp used for the tile and a date stamp for the date. Handwritten journaling with a gel pen.
The background was made with yellow Washi tape, but could quite easily be a pattern paper or painted yellow with paint.
Handmade Notebook
You can also get crafty if you like and make your own notebook. There is a whole new movement out there using Travellers Notebooks.
The covers that hold the notebook inserts are actually called Travellers Notebook and the notebooks are called inserts. They are expensive, and personally I find the covers really uncomfortable to use. I have purchased one, but I tend to take the insert out from the cover to use and only use the cover for storage. It’s an expensive storage solution! I just don’t find them to be practical. Maybe if you actually do use it when you are travelling it makes sense.
But if you are crafty and love making stuff your self, I’m going to show you how I make my own notebook inserts!
I’ve only stumbled across this new craze recently. I found some inserts online, but again they were not easy to find especially in the dot grid I wanted and with white pages. So I decided to make my own.
There are many different sizes available, but you can make a size that will work for you! For me, its the satisfaction of making my own!
What you will need;
- white printer paper. (I use slightly heavier paper because I stamp straight in my notebook)
- 12 x 12 scrapbooking pattern card. I got mine from Scrapbook Sensations I prefer to use card stock ( thicker than paper) as it makes the cover a bit more sturdy.
- Paper trimmer or a Stanly knife
- metal ruler if you are using a knife to cut
- cutting board
- staples or sewing thread and needle
- Using your white paper, fold the A4 sheets in half.
- Put them all together into one stack
- Fold your 12×12 pattern paper in half and measure the hight to be the same as your stack of white paper.
- Trim the excess using a paper cutter or a Stanley knife (here I use my paper cutter)
- Open up the booklet and measure out where you want the holes to be for sewing the notebook together.
- Measure out 5 holes, mine are 1.5″ apart or 4cm
- Push a pin, or sewing needle through the holes before you start sewing. It makes it easier afterwards. You can use anything with a point to make the holes. I used a corkboard pin and then made sure that the wholes were all the way through using the sewing needle.
- measure out two lengths of thread for sewing and thread your needle.
- Start sewing from the middle, pushing the needle with the thread out through the hole you made to the front of the book. Go back into the inside of the book through the next hole. Sew in and out to the top and then back to the bottom. Your last hole will put your thread out at the front of the book. Using your needle look your thread under the thread to make a loop and then tie a knot. Push your needed in again for the tread to end up being inside. Tie a double knot using the beginning of the tread and the end of the tread. Cut off the ends.
- Measure out the notebook to the size you would like. I made mine 4.25″ or 11cm wide and trimmed all the pages together using my paper cutter. You can do that using a Stanley knife too.
- Your notebook is done and ready to use.


I’m currently doing a project called #the100dayproject where I scrapbook daily in my notebook insert. It officially starts on the 7th of April but I”ve been doing it since March 16th.
#The100DayProject is a free art project that takes place online. Every spring (autumn in our parts of the world), thousands of people all around the world commit to 100 days of exploring their creativity.
One of my project this year is just to document one photo from my day, tell the story of the photo and use some of my pretties on the page. You can see all my entries on my Instagram page I don’t post every day, I try to collect a few days together and then post it on my Instagram.

In April I’m hosting a Photo Scavenger Hung for kids on my Modern Kindy Photo Instagram and Facebook page. But this can also be for adults! I’m going to do the prompts as part of my #the100dayproject!
If you are looking at making a handmade notebook for the kids, here is an even cheaper option!
Travellers Notebook for Kids
Use Kmarts Exercise Book $0.15, let the kids decorate the front cover using cut out magazine pictures or even cover it in wrapping paper. You can even cut it down to the size of a Travellers notebook insert if you like. I cut the one below to 4.5inch or 11.5cm wide. I made the cover with some leftover beautiful wrapping paper and just folded it over the edges.


The notebook is now ready for your kids to use to document their Photo Scavenger Hunt I’m running in April.
Can view the details on my Modern Kindy Photo Instagram
Please note all the links I have provided are for your information. I’m not selling anything and I’m not getting any money from these links. I’m just sharing ideas with you to get you started!


